| Home | PHP | Visual Basic | Flash | HTML |
| Creating Your First Program If you are familiar with several other Windows products, such as Microsoft Publisher, you've see wizards that work with you, helping you create the documents you require. Visual Basic also supports wizard technology to help you create programs. When you write a Visual Basic program, you have a choice to create an application from scratch or use a wizard to create an application's shell or general structure. After the wizard creates the application's shell, you can fill in the details. A wizard presents step-by-step questions and prompts that you respond to. As you respond, the wizard generates an application that matches the criteria you specify. Visual Basic offers several wizards, but the one you'll use most frequently is called the Application wizard. It's sometimes difficult to tell whether you should create an application shell with the Application wizard and then fill in details for your particular situation or create an application from scratch. Some people, if they've created another application already that is similar to the one they need, make a copy of the first one and make changes to the copy to create the new application. Over time, you'll learn to decide which is best for your needs in different situations. To help you get started, this section guides you through the creation of your very first application. You'll see how easy the Application wizard is to use for an application's shell. Although the resulting application will not do much (it's only a shell after all), you will see how much Visual Basic can automatically create when you use the Application wizard. As soon as you start Visual Basic, the Application wizard is there to help. The New Project dialog box, shown in Figure 1.3, appears when you start Visual Basic from the Windows Start menu. The tabs on the New Project dialog box offer these choices: Figure 1.3. You can select the Application wizard from the New Project dialog box. 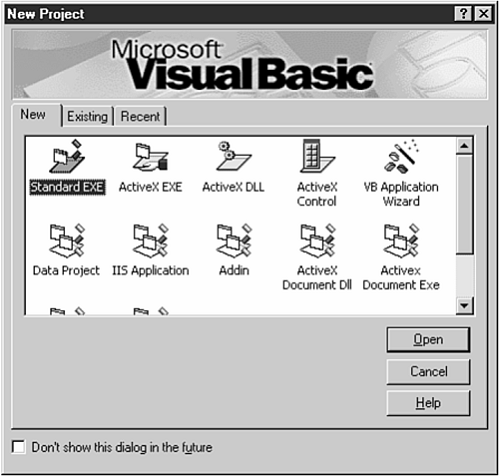 • New lets you create new applications by using various wizards or starting from scratch. • Existing lets you select and open an existing Visual Basic project. • Recent displays a list of Visual Basic projects you've recently opened or created. A project is a collection of files that make up your application. A single application might consist of several files, and the project is the collection of those files. One or more of the files might contain code, one or more of the files might contain descriptions of screens inside their respective form windows, and one or more of the files might contain advanced programming information that your program will use to communicate with other programs and modules inside the operating system. When you select the icon labeled VB Application Wizard on the New tab, the wizard begins its work. The first screen that the wizard displays is an introductory title screen that explains the wizard is about to begin. (In addition, the screen lets you load another profile that defines options, but you won't need extra profile options for this book.) As with most wizards, when you finish reading and selecting from one wizard screen, you click the Next button to display the next screen that the wizard has to offer. Figure 1.4 shows the next wizard screen from which you must select an interface type. Figure 1.4. The interface type determines how your application will process multiple windows. 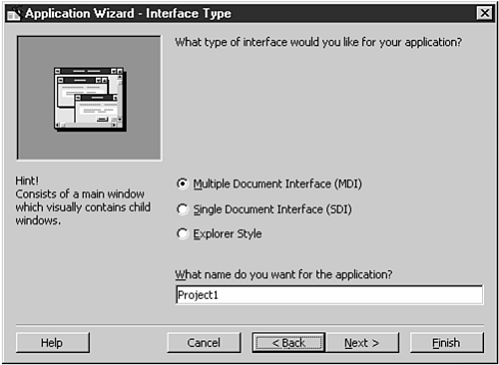 Here are the options from which you can select: • Multiple Document Interface (MDI) allows your application to contain multiple document windows. In effect, this interface lets you work with several sets of data in multiple windows within your program. Each document window is called a child window. • Single Document Interface (SDI) limits your application to one open document window at a time. Most applications that you write will probably be SDI applications. • Explorer Style lets your application take on a Windows Explorer-like interface with topic summaries in the left window and details for a selected topic in the right pane. You can click any of the three options to read a description and see a thumbnail sketch of a sample program window. Many of your applications will contain the single document interface because many applications require only a single window with data that is open at any one time. For this first example, select the Single Document Interface option. The wizard screen also lets you name your project. The default name, Project1, leaves a lot to be desired, so change the project name to FirstApp (no spaces are allowed), and click Next to display the next wizard window shown in Figure 1.5. Figure 1.5. Select the options you want your application's menu to contain. 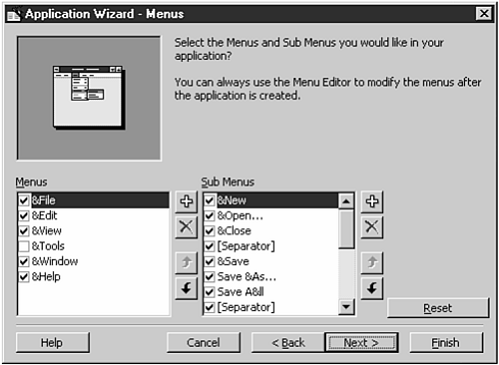 The Application wizard adds the menu options that you select to your application menu. The options are common Windows options found on most Windows programs. The menus will be the typical Windows drop-down type. You can select the menu bar options (such as File, Edit, and so on) as well as submenu options, such as New, Open, and Close. The ampersand (&) next to a letter in a menu name indicates the underscored accelerator key letter; in other words, &New indicates that New (notice the underscore) appears on the menu and that the user can select the option by pressing Alt+N. If you want to place an actual ampersand in the name, use two; for example, typing A&&B produces A&B. For this application, leave all the options as they are (keeping the File, Edit, View, Window, and Help options checked) and click Next to continue with the wizard. Note After the Application wizard finishes creating your application, the menu options will operate as expected. For example, the File menu will appear when you select Alt+F or click the File menu. The next wizard screen, shown in Figure 1.6, lets you select the toolbar buttons that your application will have. As you can see, the Application wizard does a lot of work for you. By creating an initial toolbar, the wizard takes care of a lot of tedium that you would otherwise have to handle. The left window pane indicates the available toolbar buttons and the right window pane lists the buttons (and separator spaces between buttons) on your application's toolbar. As with the menu options in the previous screen, click Next to accept all the default toolbar settings. Figure 1.6. The Application wizard saves you time by creating an initial toolbar. 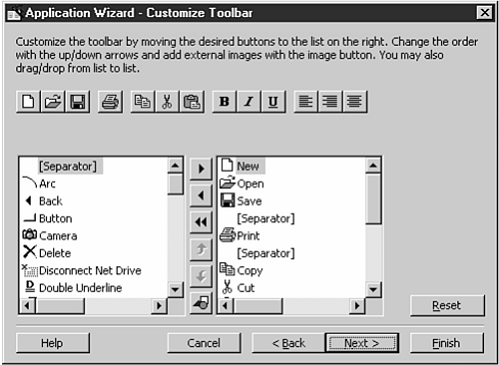 The next wizard screen to appear is the Resource screen from which you can elect to use resources in your program, such as multilanguage text files. Simple programs often do not require external resources. For this example, keep the option labeled No checked and click the Next button to continue. The next wizard screen is the Internet Connectivity screen from which you can add an Internet interface to your program if you want one. If you were to select Yes from this window (please don't select Yes here), the Application wizard would add a complete Internet browser to your application that would operate much like Internet Explorer. Without any programming on your part, your application's user can access the Internet. When the user enters an Internet address (also known as an URL [pronounced "earl"] for Uniform Resource Locator), such as http://www.mcp.com, the browser displays that Web page in the application's browser window, first logging on, if needed, using the PC's default Internet service. You can enter a default startup page address that initially displays when the user starts the browser. Caution If you add the browser to your application, you are assuming that your user has Internet access. If not, an error will result when the user attempts to use the browser. This first application requires no Internet access, so click Next without changing any of the default options to display the next wizard screen. The screen gives you the option of adding one of these standard screens to your application: • Splash screen is an opening title screen that appears when your application first begins. • Login dialog is a dialog box that asks for the user's ID and password as a part of application security that you can add. • Options dialog is a tabbed blank dialog box from which your users can specify attributes that you set up for the application. • About box is a dialog box that appears when your users select Help, About from the application menu. For this application, click the option labeled About Box. Tip The button labeled Form Templates lets you select from several form templates located in the Visual Basic Templates folder. Visual Basic installs the templates you select into your application. The templates include an add-in template that lets you add a form from your own library, an ODBC Log In form that lets your users connect to advanced database access, and a Tip of the Day that displays a random tip when your user starts the application. A form template is a model of a form that you can customize. Form templates are forms with similar properties that might appear in several different applications. The After selecting the About Box standard form, click Next to bypass the database wizard screen that lets you add external database files to your application. You can click the button labeled Finish to instruct Visual Basic to complete your initial application. Note The View Report button displays a summary of the project you have designed, and details the changes you can add and other wizards that you can run to add functionality to your new project. Congratulations! You've just created your first application without knowing much about Visual Basic and without knowing any of the Visual Basic programming language! After a few gyrations on the screen, Visual Basic displays a dialog box letting you know that your application is complete. When you click OK, the dialog box disappears, and you can run your application. Tip After loading an application from disk or creating one, run or execute that application to see it work just as your users will eventually do after you've tested and compiled the applications you write. Visual Basic is a lot like a kitchen. You are the cook, and your application is the recipe. Change the application (the recipe), and the resulting program (the meal) turns out to be different. The programming stage can take quite a while if your application is complex even if you use the Application wizard to generate an initial program. As you create the program, you won't see the program do work until you run it. Run the program (the program runs interactively by default) by selecting Run, Start. You'll see from the menu option that F5 is a shortcut key for running the application as well. Figure 1.7 shows the window that appears. Figure 1.7. Your first application is complete!  With the Application wizard, you created a fully working program (albeit only a simple shell that only does a little) just by answering the wizard's screen prompts. You have created an application that does the following: • A standard program window appears that you can resize and move. The name of the project, FirstApp, appears in the window's toolbar. • A status bar displays the date and time. You can turn on and off the status bar from the View menu. • A working menu appears with four options. Only the Help, About menu option does work (try it), but the usual menu options, such as File, Open (produces a file locating dialog box) and Edit, Cut, are all there ready for you to insert active code behind them. The About dialog box follows the standard Windows convention of displaying system information when you click its System Info button. |